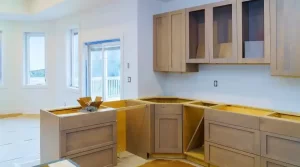
Renovating your home is an exciting yet crazy undertaking that requires careful planning and organization. While popular home renovation shows may suggest that it’s an easy-breezy process, the reality is that successful renovations take time and thorough preparation. In this guide, we will walk you through the key steps to organize your home renovation effectively, ensuring you a smooth and stress-free journey.
Start With a Clear Design and Planning
The first step in any home renovation project is to have a clear plan in place. Whether you’re writing down your ideas on a piece of paper such as a renovation wishlist, or have detailed architectural plans, having a solid vision is crucial. Consider what aspects of the renovation you can handle as do-it-yourself (DIY) projects and which ones require professional expertise. This will help you determine your budget and decide on hiring contractors or subcontractors for specific tasks.
Additionally, make sure that you obtain any necessary permits before starting the renovation. If you’re working with a contractor, they can assist with obtaining these required permits.
Prioritize Major Projects
For major renovations, prioritize significant projects like roof replacement or repair, dealing with foundation issues, fixing water infiltration problems, and addressing window and siding repairs. These larger projects can impact subsequent tasks, so it’s essential to handle them first to protect your future renovation work.
Begin by ensuring the structural integrity of your home. Address any foundation or structural problems to prevent complications in the future. Then focus on maintaining a dry and weather-resistant home by repairing or replacing the roof and siding. Take care of seriously damaged windows that might affect future renovations.
Carefully Plan for Demolition
Before diving into your renovation, plan and execute the demolition phase. If parts of your home need to be replaced by later projects, carefully demolish and dispose of those sections. Rent a large container for waste disposal to ensure a clean and efficient process. Take extra precautions when demolishing surfaces coated with lead-based paint or dealing with asbestos, as they can pose health hazards. In such cases, it’s best to seek professional assistance.
Consider Structural Carpentry
Structural carpentry involves supporting other renovation work, such as moving walls, constructing new walls, adding beams for support, enlarging window openings, and more. While some structural carpentry projects can be taken on by DIY enthusiasts, others may require the expertise of a contractor.
Plan Out HVAC, Electrical, and Plumbing Jobs
During the early stages of renovation when walls and ceilings are open, it’s the best opportunity to address HVAC, electrical, and plumbing installations. Consider hiring professionals for these critical services, as building codes often require licensed individuals to handle such tasks. Running new electrical and plumbing systems, as well as installing ductwork for central heating and air conditioning, should be carefully planned and executed during this phase.
Be Mindful of Window Installation
Window installation is a crucial aspect of most home renovation projects. Whether you’re opting for whole-house or partial window replacements, it’s essential to follow manufacturer guidelines to avoid voiding warranties. If you’re unsure about the installation process, consider hiring a professional for the job.
Plan Out Insulation and Drywall
Before installing drywall, ensure that proper insulation is in place. Different areas of your home may require different types of insulation. After installing insulation, schedule a second inspection from the electrical and plumbing inspectors before closing up the walls.
Brush up on Fine Carpentry Skills
Fine carpentry work involves adding finishing touches to your home, such as baseboards, molding, trim around windows and doors, and built-in elements like bookcases or breakfast nooks. Pay attention to detail during this phase to achieve a polished look.
Move on to Interior Painting, Wallpaper, and Other Finishing Work
Interior painting, wallpapering, and other surface finishes should be among the last tasks you tackle. Exercise caution during this phase to avoid damaging other elements of the renovation. Whether you’re painting walls, hanging wallpaper, or staining and sealing trim, take your time and pay attention to detail for a flawless finish.
Install Your Chosen Flooring
Finally, install your chosen flooring material. Depending on the room, you might opt for laminate, hardwood, engineered wood, vinyl, tile, or carpet. To prevent damage to your flooring, schedule this task as late as possible in the renovation process.
Move to the Exterior
Once the interior is nearly complete, shift your focus to the exterior of your home. Install gutters and siding during this phase, as doing so earlier may lead to damage during subsequent tasks. Consider exterior remodeling like adding a front porch or sunroom, and plan any separate structures like detached garages or swimming pools.
Once the interior is nearly complete, shift your attention to the exterior of your home. Install gutters and siding during this phase, as doing so earlier may lead to damage during subsequent tasks. Consider external renovations like adding a front porch or sunroom, and plan any separate structures like detached garages or swimming pools.
By following these step-by-step guidelines and organizing your home renovation effectively, you can ensure a successful and rewarding transformation of your living space. Remember to take your time, seek a general contractor when necessary, and enjoy the process of creating your dream home. A well-organized and carefully executed renovation will not only enhance the beauty of your home but also add value to your property. Happy renovating!


